Discovering that your Windows system is infected with a virus can be overwhelming, but there are effective steps you can take to resolve the issue. As someone who has dealt with this situation before, I can guide you through the process to help you secure your computer and get it running smoothly again.
Recognize the Signs of a Virus Infection
Before taking action, it’s essential to identify whether your Windows system is indeed infected. Some common signs of a virus infection include:
- Slow performance: Your computer may suddenly become slow or unresponsive.
- Unexpected pop-ups: Annoying ads and pop-ups can appear even when you’re not browsing the web.
- Programs crashing: Apps might freeze or close without any warning.
- Unusual error messages: You might see strange error messages that you haven’t encountered before.
- Unknown programs launching: Programs you don’t recognize might start running on their own.
If you notice any of these symptoms, it’s time to take action.
Disconnect From the Internet
The first thing you should do when you suspect a virus is disconnect your computer from the internet. This step is crucial because it helps prevent the virus from spreading to other devices on your network and stops it from communicating with its server to download more malicious content.
To disconnect, you can either unplug your ethernet cable or turn off Wi-Fi through the network settings. Once offline, you can start the virus removal process without worrying about further damage.
Boot Into Safe Mode
Safe Mode is a special way of starting Windows with only the most essential files and drivers. Many viruses are designed to be inactive in Safe Mode, making it easier to identify and remove them.
To boot into Safe Mode:
- Restart your computer.
- As your computer is booting up, press the F8 key repeatedly until the Advanced Boot Options menu appears.
- Use the arrow keys to select Safe Mode with Networking and press Enter.
Once in Safe Mode, you can begin the process of removing the virus.
Run a Full System Scan Using Your Antivirus
If you have an antivirus program installed, now is the time to use it. A full system scan will search your entire computer for viruses and other malicious software.
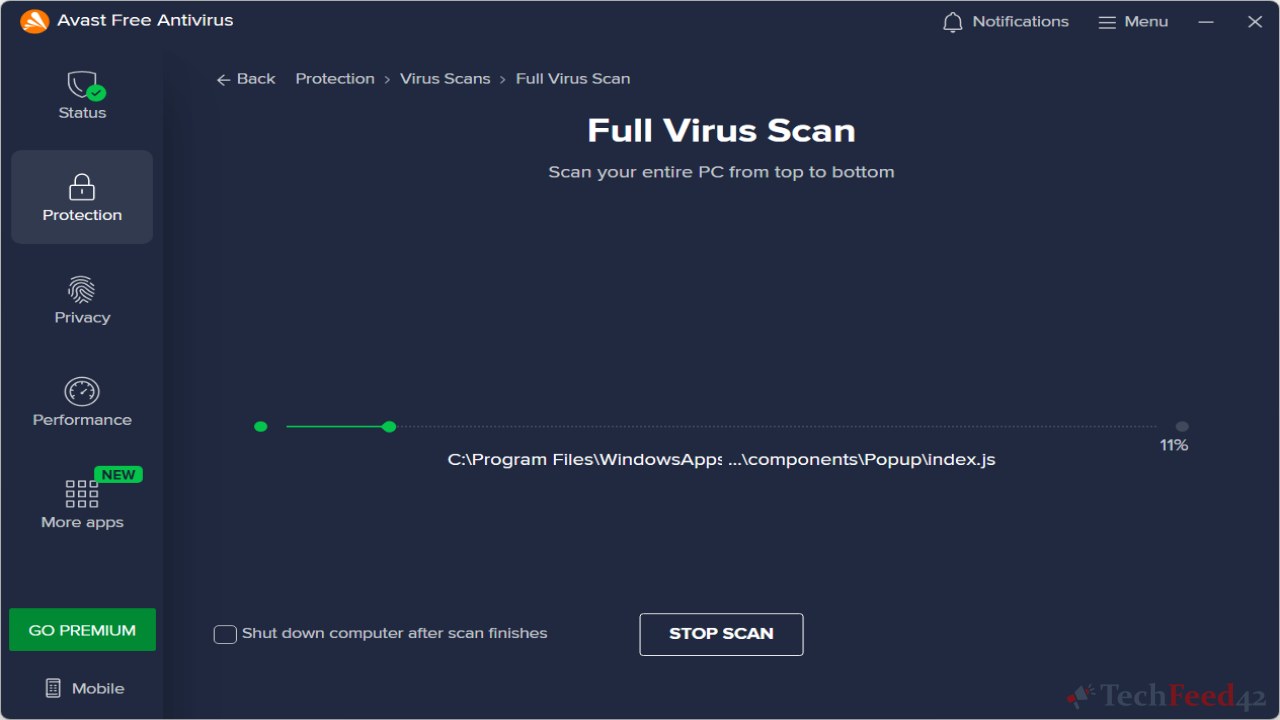
To run a scan:
- Open your antivirus program.
- Navigate to the scan section.
- Select Full System Scan or Complete Scan (the exact wording may vary).
- Start the scan and let it run. This process might take some time, depending on the size of your hard drive and the speed of your computer.
If your antivirus detects any viruses, follow the prompts to remove them. After the scan is complete, it’s a good idea to restart your computer and run another scan to ensure all threats have been eliminated.
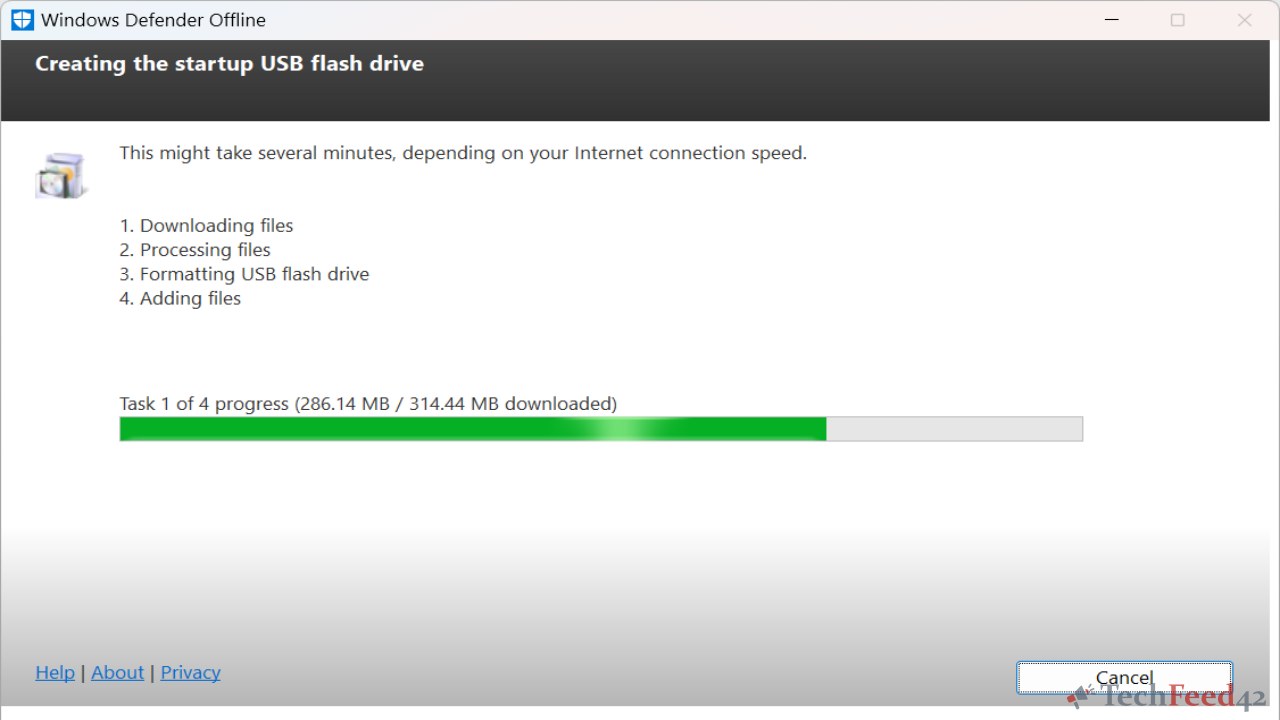
Use Windows Defender Offline
If your antivirus software isn’t able to remove the virus, you can use Windows Defender Offline. This tool is especially useful for dealing with stubborn malware that doesn’t respond to traditional scans.
To use Windows Defender Offline:
- Download the tool from the official Microsoft website on a clean, virus-free computer.
- Create a bootable USB drive or CD with the tool.
- Insert the USB drive or CD into the infected computer.
- Restart the computer and boot from the USB drive or CD (you may need to change the boot order in the BIOS).
- Windows Defender Offline will automatically start and begin scanning for viruses.
Once the scan is complete, follow any instructions provided by the tool to remove the detected threats.
Remove Suspicious Programs
Even after removing the virus, you should manually check for and remove any programs that might have been installed without your knowledge.
To do this:
- Go to Control Panel > Programs and Features.
- Look for any unfamiliar or suspicious programs.
- If you find any, select them and click Uninstall.
Be cautious not to remove any essential system programs. If you’re unsure about a program, it’s best to research it online before taking action.
Clear Temporary Files
Viruses often hide in temporary files, so clearing them out can help ensure your system is clean.
To clear temporary files:
- Open the Run dialog box by pressing Windows + R.
- Type temp and press Enter. This will open the folder containing temporary files.
- Delete all the files in this folder.
You can also use the built-in Disk Cleanup tool to remove additional unnecessary files:
- Search for Disk Cleanup in the Start menu.
- Select your primary drive (usually C:).
- Check the boxes next to Temporary files, Recycle Bin, and other items you want to clean.
- Click OK to remove these files.
Update Your System and Antivirus Software
After removing the virus, it’s crucial to update both your Windows system and antivirus software. These updates often contain security patches that protect against the latest threats.
To update Windows:
- Go to Settings > Update & Security > Windows Update.
- Click Check for updates and install any available updates.
To update your antivirus:
- Open your antivirus program.
- Navigate to the update section.
- Follow the prompts to ensure you have the latest virus definitions.
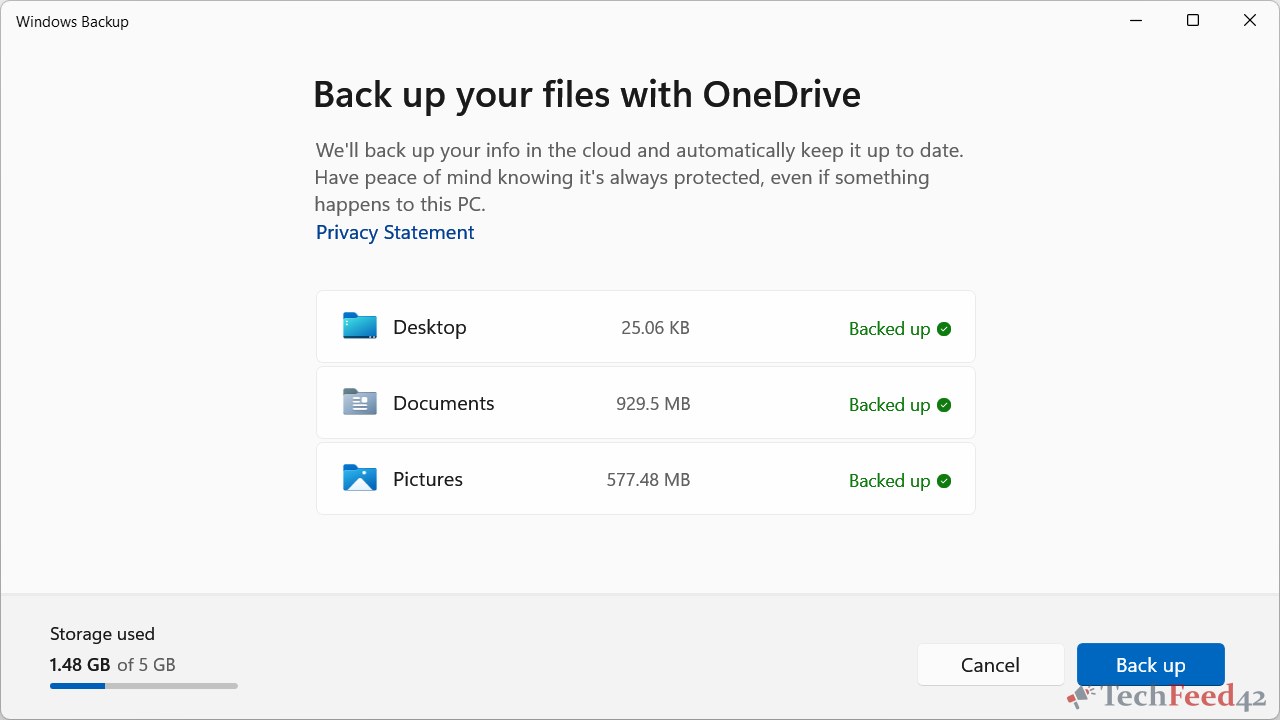
Backup Your Data
Finally, once your system is clean, it’s wise to back up your important data. You can use an external hard drive or a cloud storage service to ensure your files are safe. Regular backups will protect your data in case of future virus infections or other system failures.
Conclusion
Dealing with a virus infection on your Windows system can be stressful, but by following these steps, you can effectively remove the virus and protect your computer from future threats. Always keep your antivirus software updated, practice safe browsing habits, and regularly back up your data to stay secure.